

How to install FEEL
FEEL is a frontend which works as a command-line interpreter.
Emulators execution is done composing DOS-like commands, adding required parameters for running games or other sw. Selecting a title from FEEL game list and starting it, is like typing a command like “mame [gamename]” from a DOS shell .
Its installation is really easy.
First check your system requirements and sw pre-requisites:
– Windows XP or later
– working audio card
– Windows Media Player
– .NET framework 3.5: http://www.microsoft.com/en-us/download/details.aspx?id=21
– XNA framework 3.1: http://www.microsoft.com/en-us/download/details.aspx?id=15163
From feel.zip setup file uncompress Feel folder and all its content, and copy in your preferred path (in the ex.: E:\Feel), obtaining a structure like this:

Quick configuration (MAME)
Upon installation completion, you need to configure FEEL to manage available emulators startup. Follow this example to set MAME up.
Steps:
1) Inside Feel folder config subfolder is present. Inside it, another subfolder, named arcade is present, and still inside mame folder is present, containing mame.ini file.
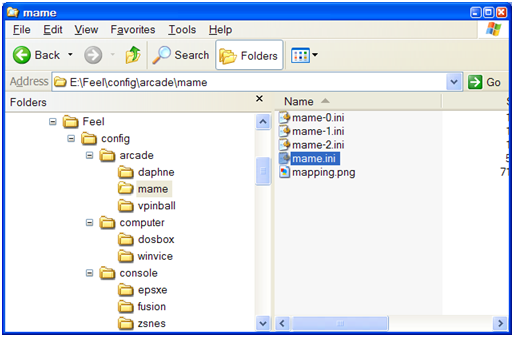
This is the only file you need to modify to use the emulator.
Lines to be modified/checked in order to use MAME through FEEL:
1) Set MAME rom folder:
rom_path C:\Programs and Settings\mame\roms
1) Set “All games” list list_type to 1 (1 = mame_list_xml) for mame compatibility (all other emu work with list_type = 0):
list_type 1
2) Set MAME exe path:
emulator_path C:\Programs and Settings\mame
3) Set MAME command-line:
emulator_commandline C:\Programs and Settings\mame\mame.exe
4) Set snapshot folder:
snapshot_path C:\Programs and Settings\mame\snap
Hint: double-check the 3 values just set running them through a “Command Prompt” window, or from Windows “Start..” command (accessible pressing Win+R)
Upon setting this options, FEEL should be completely configured for MAME usage. Save mame.ini file and start FEEL. Press menu button (default: Alt key), select “Games List Options” using arrows, and confirm using action button (default: 1 key), the select “Generate List” item. FEEL scans available roms, match them with current MAME version (indicated in emulator_commandline) and will build the relevant games list.
You are now allowed to browse the list using arrows, and starting games using action button.
If everything is okay, it is suggested to disable test mode option, in order to start the frontend in full-screen mode:
test_mode 0
Advanced configuration
Feel configuration structure, textfiles-based (.ini extension) is organized in a very simple and intuitive way to the user if on default settings, yet really powerful and advanced, able to manage any customization level, when knowing its principles (just some basic rules).
Sample structure is the following. In detail, there are 5 configuration levels:
| *master* level |
*platform* level |
*emulator* level |
*gamelist* level |
*game* level (optional) |
| config | ||||
| [platform 1] | ||||
| [emulator 1] | ||||
| All games – emuname-0.ini | ||||
| rom1.ini | ||||
| rom2.ini | ||||
| … | ||||
| [list 1] – emuname-1.ini | ||||
| [list 2] – emuname-2.ini | ||||
| … | ||||
| [emulator 2] | ||||
| All games | ||||
| … | ||||
| … | ||||
| [platform 2] | ||||
| [emulator 3] | ||||
| [emulator 4] | ||||
| … | ||||
| [platform 3] | ||||
| [emulator 5] | ||||
| [emulator 6] | ||||
| … | … |
In each directory in the scheme a main .ini file, named to its containing directory (ex.: feel.ini, arcade.ini, mame.ini) is present, and in emulator-level directories there are gamelist-level .ini files (ex.: mame-0.ini, mame-1.ini, …), which are gamelist file descriptors (All games, Favorites, …).
The 3 main rules in FEEL configuration are:
- all the parameters in configuration (see: “Complete parameter list”) can be set AT ANY LEVEL, and on more than one level at the same time
- in case a parameter is missing at a certain level, its available upper-level value will be used, going up until first level
- when a single parameter is present at more than one level, value with heavier weight (i.e.: at the lowest level) will “win”
Using these 3 rules you can define in a simple yet very precise way how the frontend will work on a certain platform, emulator or even on a single game rom.
Parameter default levels
Being more precise, there is a level at which the most part of the parameters will find its “natural” place (default level).
For example, all the FEEL keyboard settings (here some)…
action_key 1
menu_key LAlt
menu_ok LCtrl
menu_cancel 2
previous_game Up
next_game Down
previous_letter_game Left
next_letter_game Right
previous_page R
next_page F
random_game LCtrl
find_game LAlt
…
… “make sense” at *master* level (so that there’s a single value for the whole frontend usage).
Other parameters make sense (very special cases apart) only at emulator level.
Here shown for example, emulator run parameters set:
#———————————————————————#
# run emulator
#emulator_commandline E:\Program Files\Feel\clew.exe
emulator_arguments -run_mame “[emulator_path]\mame.exe [rom_name] -offscreen_reload”
…
Special parameters
At last, there are some special parameters (internally managed by FEEL), concerning list of configurations present:
[feel.ini]
platform_list arcade, console, computer, utilities
current_platform arcade [GROUP.ini]
platform_title Arcade
emulator_list mame, daphne, vpinball
[EMULATOR.ini]
gamelist_list mame-0, mame-1, mame-2
current_gamelist mame-2
[ROM LIST.ini]
current_game 1
These parameters are updated by FEEL according to the configurations found on the filesystem under config directory, and should not modified (you can however change a list order changing it in …_list parameters).
All other parameters
All the other parameters (see: “Parameters complete list”) can be placed on any config level, so that their setting will be available at frontend-level, on a single group of emulators-level, on a single emulator, or even on a single game (see: “Rom-specific configuration with .ini files list”).
Example of a parameter which is easily moved at any level: parameter
current_layout sheet
which defines display layout (see: “Display layout configuration”), can make sense if set:
- at master level (same layout in all frontend)
- at platform level (specific layout for each platform, ex.: one for “Arcade”, one for “Console”, etc.)
- at emulator level (ex.: a specific layout for MAME, another for Daphne, etc.)
“Hibryd” solutions are also possible, such as setting a specific layout for Mame, and a generic one for all the others: in this case adding current_layout parameter in feel.ini e in mame.ini at the same time will be sufficient.
This trick is particularly adequated to manage keyboard re-mapping parameter (see: “Keyboard mapping”) input_mapping:
# ePSXe show window with LAlt or Ctrl+Space
input_mapping LAlt::L, Space::V
which can be set at a default value for most emulators (usually no mapping, expressed by empty string or “#” value), and then modified on very specific systems (for instance, on computer emulators, usually requiring a full keyboard to control the games).
Alias (keywords)
When setting parameters (specially all those related to specific emulator launch command), there are some keywords used to access frontend internal data (selected game, paths, etc.).
Here the complete list with relevant descriptions is reproduced:
[rom_path] = current rom path (defined by rom_path parameter)
[rom_name] = currently selected rom name (managed da FEEL)
[rom_extension] = current rom extension (defined by rom_extension parameter)
[full_path] = [rom_path]\[rom_name].[rom_extension]
[full_dos_path] = [full_path] in DOS (8.3) format [emulator_path] = current emulator’s full path (defined by emulator_path parameter)
These keywords can be used to compose the execution command line, like in this example:
rom_path E:\daphne\gamesconfig
rom_extension txt…
emulator_commandline E:\daphne\daphne.exe
emulator_arguments [rom_name] vldp -framefile “[full_path]” -fullscreen -nohwaccel -noserversend
With these settings, starting “Dragon’s Lair” on Daphne, this command will be executed:
E:\daphne\daphne.exe lair vldp –framefile “E:\daphne\gamesconfig\lair.txt” –fullscreen –nohwaccel –noserversend
Game names -> rom names matching
On different emulators, game names:
-
- 1. match relevant .rom file name (ex.: Super Mario Land [EU].zip => “Super Mario Land [EU]”): setting parameter
list_type 0
game names will be retrieved according to rom names.
- 2a. don’t match relevant .rom file name (ex. alibaba.zip => “Ali Baba and 40 Thieves”): M.A.M.E. case
- 1. match relevant .rom file name (ex.: Super Mario Land [EU].zip => “Super Mario Land [EU]”): setting parameter
setting parameter
list_type 1
complete game names are retrieved from xml data generated by mame.exe, with no additional file.
- 2b. don’t match relevant .rom file name (ex. lair.txt => “Dragon’s Lair european version”): case of other emulators
- In case of other emulators (es. Daphne) which require a specific rom name, not adequated to be displayed in FEEL lists, set parameters
list_type 0
nms_file [.nms file name]A textfile with .nms extension (ex. daphne.nms) will be saved in the rom path, with the following structure:
[game name] | [rom name without extension]
Example of .nms file:
Dragon’s Lair european version|lair
Dragon’s Lair II|lair2
Space Ace|ace…in this way in frontend lists complete game name will be displayed (ex. “Dragon’s Lair european version”), but emulator command line will be composed with the correct game name requested be the emulator (in the ex. “lair”).
Keyboard re-mapping options
In the (typical in a home arcade-cabinet) case of using an arcade dashboard as frontend’s unique controller configuring a large number of installed emulators, keyboard re-mapping can be useful (assignment of a keypress to another key).
Using parameter
input_mapping
it is possible to make keyboard commands sent to a specific emu, when run, are “filtered” and replaced by other commands, which will receive only the keypress of the fitered key.
Re-mapping format is
[input keyboard sequence] :: [output keyboard sequence]
Esempio di configurazione:
input_mapping LAlt::L, Space::V
These settings are useful for:
- ridefine a specific keyboard sequence (ex.: ESC) to close an emu accepting a specific command only (ex.: LAlt-F4)
- cancel a unvoluntary keypress of emu command keys (ex.: LAlt, key 2 of Player1 on MAME, on some emu opens program menu locking game, etc.)
- replace not needed commands with specific emu requested ones (ex.: on home computer emu, it’s usually requested to press keys such as F1, F3, Y/N, etc., usually not available on common dashboard commands)
It’ even possible, using “+” operator, replace a single key key-press with more than one keys on output.
Example:
input_mapping Esc::Lalt+F4
This capability is very useful using Windows games/apps, which usually accept Alt+F4 sequence as Close command: re-mapping Esc key with Alt+F4 sequence, they can be closed with the same key as MAME, cuncurring to the dashboard commands’ consistency.
Re-mapping keyboard commands complete list
# A … Z
# 0 … 9
# LAlt = Left Alt
# LControl, LCtrl = Left Control
# RControl, RCtrl = Right Control
# LWin = Left Windows
# RWin = Right Windows
# Tab = Tab key
# Space = Spacebar
# Backspace = Backspace
# Enter, Return = Enter
# Pause = Pause
# Escape, Esc = Esc
# PageUp = Page Up
# PageDown = Page Down
# End = End
# Home = Home
# Insert, Ins = Ins
# Delete, Del = Del
# NumPad0 … 9 = NumPad keys
# Multiply = *
# Add = +
# Subtract = –
# Divide = /
# F1..F12 = Function keys
# None = No key (useful to totally disable a keypress)
NOTE: keyboard re-mapping is based on DirectInput and so DOESN’T WORK on emulator reading keyboard in “RAW” mode.
Statistically speaking, there are very few cases: the most known one is MAME in its plain version.
Mame can be anyway made compatible with a simple code fix, and exe recompile. In particular, you will want to activate FORCE_DIRECTINPUT option in this sourcefile:
http://mamedev.org/source/src/osd/windows/input.c.html
Rom-specific configuration through .ini file list
Another degree of customization is .ini file (one per rom) list mode, which allows to customize config parameters at single rom/game level.
Setting at emulator level (ex.: mame.ini) parameters
list_type 2
rom_extension ini
rom_path [.ini file list path]
(i.e.: list_type 2 = .ini file list), it will be possible to set all launch the single rom with specific run parameters, suche as custom commandline, pre and post-emulator commands (mount/unmount drive images etc.), keyboard remapping, others:
pre_emulator_app_commandline
pre_emulator_app_arguments
emulator_commandline [exe game commandline]
emulator_arguments [optional parameters]
emulator_nodosbox 1
post_emulator_app_commandline
post_emulator_app_arguments
input_mapping [keyboard re-mappings]